Pages

Wednesday 30 September 2015

Patrol Angis Pro-Painted Set


I was hoping to bring you a Comic Life AAR to acompany the recent Patrol Angis report I posted, but unfortunately I am having ongoing technical issues with the software which is preventing me from completing this. So, in the meantime, I thought I would give you a brief review of what you get when you order the painted version of the Patrol Angis Starter.

The starter comes with two complete sides for playing the three scenarios included in the rule book. As well as the figures, you get the rules, the monthly freebie miniature and an additional Patrol Angis Sculpt. The additional PA figure also come painted, but the freebie miniature does not (understandably).

So let's take a look at the sides. The Yordan side, painted in green, consists of a weapon platform, a Post (i.e. squad) of Retained Knights and 3 battle armour suits. Here are some pics:


Yordan Post
Yordan Weapon Platform
Yordan Battlesuits

Here is a close up of one of the suits (just to prove that sometimes I can focus my cheap, old camera!)


The Yordan force assembled.


I really like the green/yellow paint scheme on these guys and the folks at the Ion Age don't scrimp on the basing either.

The other force comes from the Prydian army and is comprised of two posts of Retained Knights and a command squad:


Female Retained Knights
Retained Knights


Close up of one of the knights


Prydian characters

Group shot!


Again, I really like the paint scheme and basing. The figures are all painted with artist acrylics (available from The Ion Age here) and the results have made me consider swapping to them as well as it works out much more cost effective than normal model paints.

This is the first time I have got figures that have been pro-painted in this way, and I am rather impressed. If I were to aim for a similar standard, either I would fail to achieve it, or it would take me so long that I'd give up. So in that regard they are excellent!

Here's a picture of the extra figure you get when you buy the set:


To finish off, here is an 'action shot' of all the figures:


The pictures probably tell you more than words can, so I'll just reiterate that I am very pleased with them!

I should also mention that, as presented, the Female Retained Knights are usually painted in Yordan colours. As I prefer to mix up the male and female characters, I asked if they could be painted as Prydians so I had the two squads to play around with and the request was handled no problem. How accommodating of the chaps at The Ion Age!

If you are interested in buying painted figures, then you should check out the Ion Age site. As it is the same company as 15mm.co.uk and Alternative Armies, you can check out painted options from those sites as well.


Wednesday 23 September 2015

Zomtober 2015


What, but it is only September?! Yes, but we are right at the end of it, which means Zomtober is only a few days away. As such, I thought it better to plan for some frantic painting. I've got a fair bit of zombie related lead in my pile so I've drawn up a list of some key things that could do with sorting out.

HazMat Teams

I've wanted to paint some of these for a while, as there is a certain appeal in attempts to catch zombies rather than blow them away! Or is that just me?!

Riot Police

These have plenty of utility in 'early days' scenarios when crowds of civilians are getting out of control. And later, when order needs to be maintained in the'safe' zones.

U.S. Infantry

I have a woeful lack of military types available for my games. Something that would be good to sort out as automatic weapons are always the best solution to a zombie problem. Not. 

Time is really at a premium at the moment, but I'll try and paint what I can and get at least one game report done for Halloween. 

Monday 24 August 2015

ATZ PEF resolution

(Just to explain the title for those who are not familiar with the rules, it refers to the resolution of Potential Enemy Force counters in All Things Zombie!)

A while ago, I spoke at some length about my idea for a card deck to replace the tables in the ATZ book. My rules for this were covered here and here and a sample game was played here

The problem I've had, however, is that I don't get to play ATZ that often and I have ended up wanting something simpler. What's more simple than a deck of cards, you ask? Well, it isn't so much the deck of cards that's the problem, it's that every time I paint some figures I want to use, I have to pull out the laptop, design a new card, hope I'm not out of colour ink, print it on suitable paper and then sleeve it. Which is, I'm afraid, a bit too much work than I want to put into it. 

So what about an alternative? It needs to have roughly the same effect as the deck of cards, but be a bit more than just pre-generating a handful of encounters. 

After a bit of a think, I decided it had to do certain things. It had to allow for a decent chance of zombies being encountered. It had to provide a range of encounters of varying REP (this being the skill level of the forces encountered). It had to be easy to set up and need minimal bookkeeping. 

In the end I opted for a partially completed encounter grid. Certain aspects, such as REP, were pre-defined, as were the odds of a zombie encounter. Other aspects were defined at the start of the game by the player and allowed for variation and flexibility between games. 

I drew up a grid on a sheet of paper. Cell selection would be done by rolling d6 along each dimension. Obviously it is hard to fit a square grid on a rectangular piece of paper, so I decided that a roll of 1 along the horizontal axis would mean zombies had been encountered instead. This number could vary, but I think 1d6 would be a reasonable amount. (Personally I like to use a special die with a skull as a 1 for this axis. A nice little aide memoir!)

Next I populated each cell with the REP of the figures. Cells selected by higher d6 rolls corresponded to higher REPs and these are printed in the box as I don't expect these to change between games. Before playing, I place figures in each box, thereby pre-defining the type and quantity encountered. Going through my figures in this way takes almost no time at all and means it is easy to add in any new ones I've just painted. 

If I want any special rules or skills to apply to the figures, I can just pencil these into the box as a reminder, or just decide to roll skills up as I go. Also, if I need more encounters to be zombies, I can just mark the box as such and if that one is rolled, I can just roll up a number of zombies. Or if I don't have enough human figures to fill out all the boxes (there are 30 after all!), I could just stick a zombie or two in any left over. 

To make things more interesting, I can add a note in a few of the boxes to roll a second result and place that 1d6 inches from the first. With this additional mechanic I could stumble across a group of civilians being attacked by zombies or a pair of gangers engaging a SWAT team in a firefight. This adds an instant layer of narrative to the game. 

So when I resolve a PEF, all it takes is a simple roll of two d6 and I know all I need. Plus I don't have to manage a deck of cards or even limit what the figures are. So what was defined as a REP 5 axe wielding hero by the cards could easily be a REP 3 civilian in another game, who happened to be chopping wood when the apocalypse happened!

Simple! (Click to enlarge)

I could also happily laminate the sheet and use marker pens to note details or changes on it. And it is easy to refresh it or just print a new one for another game. Next up is a good test of the new 'system'. 

Sunday 2 August 2015

Patrol Angis AAR

I've been getting into Patrol Angis by The Ion Age a fair bit recently and thought it time I posted up a game report. This time I decided to do something a little different. I'm actually doing two reports of the same game. One is a normal report with pictures and details of what happens each turn. The other is going to be a 'comic book' style report which is more focused on the narrative of the game. The following report is the normal one.

The scenario is the second one from the rule book and involves the Prydian forces trying to take a hill which has a Yordan squad and some artillery on top of it. 

I am going to command the Prydian side and leave the Yordist one to the solo play mechanics included in the book. These are described in more detail during this report.

A quick note on terminology: I have tried to stick to the in-universe terminology for this report. A squad of 10 men (or women) is called a Post,  a 4 man fire team is called a Demi, and a 2 man team is a Mina. Additionally, the forces on both sides are comprised of Retained Knights, warriors in powered armour. Their standard armament is the Angis Rifle and, among other support weapons, they also utilise the Anvil 888 missile launcher. Thought I'd mention this now in case it gets confusing later!

Finally, all die rolls are made using d8s, except for the initiative roll, which uses d6s.

Set up

The terrain was set up as close to the scenario description as I could make it. The Prydians started at the edge of a forest and the trees thinned out as the ground level rose. At the other end of the table was the highest level of the hill, with no cover but a good view of slope. 


The Yordans set up on the hill. The artillery was placed slightly to the right of the peak and the Post was located to the left. After this, their actions will be left to the solo mechanics.  


As for the Prydians I decided to keep one  Post complete with the aim of charging it forward and overwhelming the enemy. The other Post I divided into two Demis (4 soldiers)  and a Mina (2 soldiers) so they could approach on both flanks. One Demi would advance along the left flank, the other plus the  Mina would do the same on the right. The Mina consisted of a missile launcher and loader. The idea was to see if the Demi on the right could cover the advance of the heavy weapons team and shield them from fire. My overall plan was all a little 'charge of the light brigade' for my taste, but it was all I had! I also only had 10 turns to achieve my objective, so I had to move fast!


Turn 1

The Prydians won the initiative roll  3 to 1, so 3 order tokens were given to the loser and the same number with an additional one to the winner. The number of tokens is always based on the winning roll. 

The basic turn structure, following the initiative roll, involves players alternating in placing activation tokens by the elements they wish to activate. You can place them as you wish, so feel free to put all of them on your best squad, just don't expect to win any games by doing this! In the main part of the turn, players take turns to remove a counter from a unit and carry out one of several possible actions with it. 

The rules state how the AI's tokens should be distributed, basically as evenly as possible! Any left over are divided starting with the element closest the enemy. So the weapon platform was given 2 and the Post of Knights received 1.

Now my tough decisions started. I had 4 tokens and 5 groups of soldiers to split them between. I decided to focus on an advance in cover on the flanks and hold back in the centre for now. I gave two to the Demi on the right flank (to help speed their advance), one to the heavy weapons team with them and the last one to the Demi on the right flank. 

It is a tough part of the initial deployment to decide whether the flexibility from splitting squads is worth the potential of your force not having enough order tokens to activate everyone. Of course, you can join or split your elements during the game, but this does require an order and hence a valuable activation token!

When playing solo, the AI takes its turns by selecting the nearest element with an activation counter and drawing a coloured chit from a bag. Depending on the colour of the chit and the distance to the nearest enemy, the element takes an action. This is also affected by the overall stance taken by the AI during the scenario. In this case it was to play defensively. 

On with the game!

On my left flank the Demi was commanded to dash for the edge of the forest. The enemy responded to the advance by opening up with artillery fire. The weapon, a Moth 88 weapon platform, has an area effect and rolls 3 dice when it attacks. The area effect rules basically multiply the number of hits. For example, a area effect value of 3 would mean 2 hits are actually worth 6!
Ranged fire in this game is brutal without cover or armour, and even armour isn't much use when a strong enough shot hits you!

An attack rolls a number of dice depending on the type of weapon being used. The artillery has a value of 3 for this. The base to hit roll is 2+ on a d8 (yes, that is not a typo).  The Demi being attacked rush-moved, so a +2 is applied in their favour. They get another +3 for being in the woods. The weapon platform took an Precise Shot, giving it a -1 bonus. So in this case the modified roll is a  6+. The squad had a special camouflage system installed in their armour, but this only has an effect when they are stationary (think Predator).

A roll of 3, 5 and 8 resulted in 1 hit. Not so bad, you might think. But due to the area effect value of 4, it meant that the hit rolled actually resulted in 4 hits on my troops. Ouch!

The next step is to compare armour against the strength of the hit. My guys have an armour of 3 and the artillery attacks with strength 4. The difference is applied to a base number of 4. 4-3+4 equals 5, meaning each of the four hits needs a save roll of more than 5 on a d8. A handful of dice later and 2 warriors are blown to bits! Taking this hill is going to be tough!


The casualties mean the remaining two have to take a morale check. They fail, which normally means an element takes a marker that has to be removed by spending an activation before they do anything else. Fortunately, my Knights are all Veterans, allowing them to remove the first such marker taken in a turn.

Let's hope the right flank looks better...

As the Rush Move gives a good modifier, I decided to repeat this over here. Nothing to shoot at yet and right now my plan is all about closing the distance. Retained Knights all have jump jets in their armour, but they can only be used twice in a game and I reason they are better spent later to close the last gap and get in some point blank fire. Hopefully! 

The weapon platform now takes another shot at the poor Knights on my left flank.  By default, support weapons or those with an area effect can only fire once per turn, but if accompanied by a soldier with the Loader ability, they can fire twice per turn. At the time I decided to add this to give the AI more of a chance, but after the last shot only hit with one out of three dice and STILL took out half the Demi, I'm starting to regret it...

I regret it even more when the weapon platform does the same again and kills the remaining two soldiers. It seems it isn't enough to dash for it and hope for the best. Troops in Patrol Angis can also take a Self-Preservation option and dig in to increase their armour value. I think I'll need to consider that option more closely in future!


Now it is my go again. I order the Knights on the right to move forward towards the next small wooded area. Luckily this is more than 10cm across, so as long as enemy LOS passes through it my guys can't be seen and shot at. A brief reprieve from the chaos of battle. 


The final AI activation of the turn is for the Knights on the hill. The token I draw for them says they should move to the enemy and fire. However, as the scenario objective is to remain in control of the hill, they stay where they are and enter overwatch instead and receive a marker to show this. They will be able to discard the marker and fire during my future activations. 

My final activation is to move up the heavy weapon Mina into the forest behind the troops covering for them. And that ends the first turn. 

Turn 2

The initiative roll was 2-1 in my favour, so it would be a quick turn. Not so good for me in terms of speeding to the hill! As I won, I received three activation markers. The enemy was given two and placed one on each of their elements as per the solo rules. I placed one on the Demi on the right flank and two on the heavy weapons team following them. Hopefully they will make progress there. 

My first activation was used to move the Demi round the trees, aiming to still keep enough cover between me and the artillery. This meant the Yordan Post was now the closest element to my forces, so I activated them next. 


The Yordan Knights drew a token for their activation which meant they were to take a Precise Shot. With no targets in range, this converted to another overwatch counter. If these remained, the hill would be even more challenging to take!

With my last two activations on the heavy weapons team, my choices are limited. But that was a fault in my original plan I guess! It's worth noting that any activation tokens placed on a commander figure can be 'transmitted' to another element, giving additional flexibility and therefore the ability to respond to enemy activity better. They may be 'lost in transit' though, so it is a bit of a risk. Perhaps I should have considered that option more closely. Anyhow, that's by the by right now, I need to get on with the advance!

It is now that I realise a huge flaw in my plan. My distraction on the left has been taken out by the artillery. My 'cover' on the right has advanced to the woods and are out of sight. This means that any forward movement of my heavy weapon team will leave them visible to the weapon platform on the hill... and I have a suspicion how that will work out. I scan the available activation options in the rulebook, but none of them seem to help. Then I remember! Jet packs! Any other movement would be hindered by the forest the team are in and slow them significantly. But the jet packs would ignore the terrain penalty and double their normal move to 24cm. Perfect!

So my first activation sends them scooting forward to join the other element hiding behind the trees. The last activation for the enemy is on the artillery and they still have no targets, so they enter overwatch. I made the advance forward just in time to avoid that! My final activation is for the weapon team to dig in, just in case...

Turn 3

Turn three starts with the initiative roll going 5-4 in my favour. The AI gives 3 markers to the squad and 2 to the artillery. I decide it is time to take more definite action and give 2 to the Demi on the flank, 1 to the heavy weapons team, 2 to the Post hiding in the woods in the centre and the last one to my commander. 

With the enemy at full strength and firmly defending the hill, ready to shoot at anything that pops into sight, I think the time for subtlety might have passed. The one thing in my favour right now is that, having won the initiative roll, I get to decide which figures are removed as casualties when hits are taken. This will allow me to prolong the life of any heavy weapons in an element. 

My other problem, however, is that the enemy have enough overwatch tokens to make even moving forward to fire a risky proposition.

The first activation I take, combines the elements on the right flank into one. The enemy responds by putting another overwatch counter on the Post of Knights on the hill.


Now for some action. The element in the centre Rapid Moves to the edge of the wood. This brings their missile launcher into range of the artillery, but the artillery can also overwatch fire at them, which it does. With a plus 2 for the Rapid Move and a plus 3 for cover added to the base To Hit value of 2, the artillery requires a 7 on each of its 3 dice for them to hit. Luckily it fails on all of them! The overwatch token is removed.


Next the artillery activates and takes a Precise Shot at the infantry in the woods. The modifers for Rapid Move and the cover remain, but Precise Shot gives the artillery a -1 to the target number, so it now needs 6s. A roll of 4, 6 and 8 gives 2 hits, quadrupled to 8 due to the area effect. Better hope their armour works! Unfortunately I only save 2, resulting in 6 casualties. Now I need to make a Morale check, requiring a 7+. I roll a 7! If I had failed, they would have lost their second activation token immediately in order to Re-Motivate themselves, and I need that one to fire at the artillery!


I take my next activation with the battered remains of my squad and prepare the Anvil 888 launcher to fire. The weapon platform is just within range. Alas, I am unable to take a Precise Shot in the same turn I have done a Rapid Move, so I'll just have to carry on with a normal shot. On the plus side, the artillery is in the open. There no to hit modifiers, so I roll two dice needing a 2+ on each to hit. I get my two hits and, as the Anvil has an Area Effect value of four, it is converted to 8 hits! Each hit is strength 4. The enemy are wearing the standard armour of the Retained Knights, the same as my troops, giving them an armour rating of 3. They get a +1 to this as the artillery piece offers some protection itself. So using these to modify the base save value of 4 gives a result of 4 (4 +3 +1 -4). Save rolls need to be higher than this, so I roll 8 dice and score 1, 1, 2, 3, 4, 6, 7, 8. Three saves and 5 hits gone through. The weapon team can discard their activation token to ignore 2 hits if they like, but that would still leave 3, so they are annihilated!


I'm starting to wonder why I didn't do that on my first turn!

The squad on the hill is probably feeling quite concerned at the destruction of the artillery. They take a Self-Preservation action (forfeiting their overwatch tokens) in order to gain a +2 to their armour rating until they move again. Fair enough.

I decide it is time to pile on the hurt and order my squad on the flank to move and fire. They use jump jets to leap over the woods and up to the edge of the hill. There is still some cover between them and the enemy in the form of a small copse. At least they don't recieve fire from overwatch! The missile launcher that the squad has can't fire as it moved, but the other 5 soldiers can attack with their Angis Rifles. In total they can roll 5 dice to hit. The cover gives a +2 modifier and a +1 for the Chameleon Circuits in the enemies' armour as they have not moved, so they end up needing 5+.


I score 4 hits, now for armour penetration.... The base save number is 4 (as always). I add 4 due to the strength value of my weapons, subtract 3 for the armour the enemy wears. They get an additional -2 from the self protection action bringing the total to 3. They need to exceed this on the dice to save and do so with two of them. I allocate one hit each to two of the support weapons they carry and the last one to one of the riflemen. Unfortunately they pass their morale test with no problems.


The rules allow for elements fired upon to shoot back after casualties have been determined (this should have been before the morale check, but I forgot!). Support weapons are not able to do this, so the squad is left with 5 weapons which can (all standard Angis Rifles). The target number is the same as when I fired upon them, but as I moved I don't get the benefit of the Chameleon Circuits, so they need a 4+ to hit. They only score two, thankfully. I don't save either of these, so I eliminate two riflemen. The morale check is passed.


The enemy now activates and uses its last token to fire on my squad again. The only weapons in range are the Angis Rifles. They also have a Plasma Rifle, but this is a hard-hitting short-range weapon. So 5 more dice rolled and they get 3 hits! With luck I save two of these and lose just one more rifleman. Casualties have mounted up, however, and I fail the morale check and am forced to discard their last activation marker.

This is where the commander comes in handy. I put one token on him at the start of the turn. He can now take a Command and Control activation to 'transmit' his token to another element on the board. I do this and place the token by the remains of the force on the hill. On a roll of 8 the orders are lost in transit, but I score a 5, so all is well. 

As the enemy is out of activations, I now use this last token to take a Precise Shot. With this extra bonus, my guys need a 3+ to hit. All the dice are successful, meaning I get two hits from the rifle and 8 from the missile launcher. Nice! As all the hits are Strength 4 I may as well roll for the saves all at the same time. Each is saved on 4+. Three hits get through and the enemy fail their morale test meaning they lose the first activation token put on them next turn. Return fire takes out another of my men and I also fail the morale test, leaving me in the same situation as the enemy and needing to discard their first activation.


That was certainly an eventful turn!

Turn 4

Initiative for this turn is 5-4 in my favour. I use one token to re-motivate the remaining soldiers on the hill and give them another one to shoot with. The other four go to the Post loitering in the woods. The enemy only has one element left in play, so they get all the tokens, minus the one required to re-motivate them.

I fear my guys on the hill would get wiped out this turn, so my first activation is for them to fire their missile launcher. I use the Precise Shot action and score one hit (converted to 4 due to the area effect of the weapon). Two of these get past the armour of the enemy, but, having so many activation tokens, they utilise a rule that allows them to discard a token to ignore two hits. They emerge unscathed! Their snap fire in return takes out one of my men and I fail the resulting morale check, therefore placing a Re-Motivate marker. It doesn't matter in the end, however, as fire from the enemy activation immediately after is enough to kill the last soldier.


It's time to get sneaky! I move my last element so the enemy are in range of their missile launcher, but out of range of anything the enemy has. At least that way they will have to move and lose their self-preservation status if they want to return fire. 


The chit draw for the Yordans indicates they go into overwatch, not that it will help them now! I open fire with my launcher... The enemy still haven't moved, but there is no cover between us, so I end up needing 2+ to hit (Base 2+, +1 for Chameleon Circuits, -1 for Precise Shot. Two hits later the enemy is having to roll 8 dice to save! They take two casualties and also fail their morale check, forcing them to remove an activation token.

Their final activation should see them remaining still, but I choose to overrule this as it is obvious in the current situation that they will just get whittled down from long range. So they move forward and take a shot (only one of them has a Angis Rifle now). The shot causes a casualty and I also fail morale and lose an activation token. I now have two left. Two of my infantry can return fire and I score two hits! There is now one enemy on the hill, but he his only armed with a close combat axe, so I can pick him off at my leisure.


The hill is mine!

I have to say I really enjoyed this game. It was a bit of a learning experience and there is a lot I would do differently if I played it again. But to my mind that is the sign of a good game, that it reveals itself to you when you play rather than just being obvious from a read of the rules. It provides some interesting challenges and choices during play and, as someone who often plays solo, I am looking forward to testing out the solo mechanics in other scenarios.

All figures pictured are part of the pro-painted starter set, which you can buy from The Ion Age website. 

You can read more about the mechanics and why I like Patrol Angis in the review I posted on this blog and can find that here .

Soon I will be posting the 'comic style' report of this scenario and also a more detailed look at what you get in the pro-painted starter set. After that, some more reports hopefully!

I hope you enjoyed this AAR. Please feel free to post any comments and I will do my best to respond to any questions!


Wednesday 1 July 2015

15mm.co.uk Automata

As much as I expect the new Terminator film to be a disappointment, it has at least got me thinking about doing some Terminator gaming... Although I was tempted by the new game by River Horse, I ended up deciding that I really don't need to start another 28mm project (but I came very, very, close...)

Instead, I thought it was time to do something I've been meaning to do for a while and get hold of some of the Automata Infantry from 15mm.co.uk.

I think these are some of the best out there for Terminator games in 15mm. Sure, they may not be 100% identical, but why would they be? What is important for me is that they look close enough from a distance and I think these do.

Here is the pack after a quick paint job:

I really need to sort out the focus on my camera... :(
As a bonus, they will work well in a number of 15mm projects I have in the pipeline, including Judge Dredd and Rogue Trader. So all in all I think they are well worth getting hold of and £4 for a pack of 10 isn't too bad a price.

To end, here's a better close up picture.


Wednesday 24 June 2015

A look at: Patrol Angis

Recently I have been scouring the web for information on Patrol Angis, the new set of rules from Gavin and co at The Ion Age. I was intrigued by the description of the rules and the setting but could not find a great deal more than what was on the website. So naturally I thought 'what the heck, they are only £10' and bought a copy! To make up for the lack of information available, I thought I'd give my initial thoughts here.

The Book

The book itself is a very well presented A5 size publication with full colour cover and black and white images inside. It has seriously started to make me wonder why more rules are not this size! It means they can easily be rested on the table during a game for quick reference and it also makes them easy to handle or hold in one hand while the other one is rolling dice or holding a refreshing beverage. Good thinking, chaps!


The Background

The first 20 or so pages of the book deal with the background to the setting, which could be described in a nutshell as being the Wars of the Roses in a Space Opera setting. While the rules could be used with other miniatures, the setting and content of the book is obviously geared to the Ion Age range. What is different about this book is that, while my usual inclination is to discard the fluff and just play with my existing figures, reading this particular background has really got me wanting to play the rules with the Ion Age figures and in the Ion Age setting. I really wasn't expecting to feel that strongly, but the background in the book is highly interesting and different to other things I have read.

Force Organisation 

The rules say they are aimed at each player having a platoon sized force. This immediately made me think of three squads plus a command group on each side, but I was wrong! While this gives an idea of the number of figures you might expect to field, you actually have quite a lot of flexibility in how your force is organised. You can choose to deploy in squads, sure, but you can decide to split your squads into fire teams or even smaller units if you wish. So there is actually a good amount of decision making in terms of how you wish to deploy your platoon and you would want to think a bit about how you might use your options to achieve your objectives.

The elements you decide to deploy are organised in a fixed way, as shown by the picture of suggested movement trays:


It should be noted that this book contains rules for infantry, power armour and infantry-sized vehicles, such as bikes. Larger vehicles and how they fit into the force structure will be covered in a  future book.

Core Mechanics

Unusually for a game of this type, the core mechanic is an intriguing command and control mechanism. Initiative is a d6 roll, but the higher roll determines how many activation tokens are received by each side. The side which loses initiative gets the number shown on the die, the winning side gets that number plus one. So if the initiative roll was 3 and 5, the side which won gets 6 tokens and the side which lost gets 5. A good way to give a little edge to the winner without being overpowering.

Starting with the side that lost initiative, players then take it in turns to place an activation token next to an element in their force. Unless specified, an element can be assigned any number of tokens during this process. This is an interesting mechanic which leads to you trying to out guess and out plan your opponent before you have even touched a miniature!

During the main part of the turn, starting with the side with initiative, the player removes an activation token from an element and chooses what that element will do. There are no less than 11 (well, 10 and the option to pass!) choices to select from and these cover moving and firing, rapid moving, precise firing, overwatch, reorganisation, recovering morale, digging in for self protection and lots more. To add to this, elements which are fired upon can also use activation tokens to negate hits against them, so you may have to make a tough choice about taking casualties or keeping your head down for a turn, which in effect is a neat little pinning mechanic!

Now let's be clear, fire combat in this game can be pretty deadly! All rolls to hit are made with a d8 and have a basic target of 2+. That's right, there is only a 1 in 8 chance of missing a target in the open! Of course, terrain modifiers come into play and each item of terrain provides a bonus from +1 to +3 depending on how much of the LOS crosses it. If there is terrain along more than 10cm of the LOS then no fire is possible. The max terrain modifier is +4. So terrain starts to be rather important in this game! Any hit figures can make an armour save roll, which is a 4+ modified by the armour worn and the penetration of the weapon.

Taking casualties results in the need to make morale tests. Failing a test results in the loss of an activation token if the element has one, or the gain of a 're-motivation' token if they do not. The re-motivation token has to be removed with an activation before any other action can be taken.

Lets not forget that you only get between 1 and 7 activation markers each turn (skewed toward the high end as the winning roll determines the number). So if your force consists of smaller elements then you have some tough choices to make when allocating them. And it gets even harder when morale checks force you to remove them or waste one next turn to re-motivate an element.

Other Rules

After the main rules section, there are a couple of pages outlining a series of special rules which may apply to units, covering things like jet packs, medics, snipers and special gear. There is also a section on solo play, which will be largely familiar to players of Flintloque. Then there are 10 pages of stats for the various forces available and some 'fluff' on the types of weapons and armour available. The book ends with some brief designer's notes and some additional background which outline the 'rules' of the setting in terms of why certain technology exists and why the universe works the way it does.


My Thoughts

I have to say I wasn't sure what to expect from this book. I was expecting something solid, fun and playable. What I found when I read the rules was all of those but arranged around a command and control system that I have not come across before in a sci-fi rule set and some nicely brutal combat rules that punish commanders who think acceptable battle strategy is advancing across open ground.

I also found myself really getting drawn into the background and enjoying it, it manages to feel 'fun' but also have a nice amount of detail to it.

My only slight criticism at this point would be that I found some of the rules sections to be a little unclear. My questions were answered by the examples, however, so there were no problems left after I had read them, although I prefer examples to be optional rather than required reading. But that is a minor point in an otherwise excellent looking set of rules.

There is a lot crammed into the 64 page book and the rules themselves do not take up a massive amount of it (about 17 pages for the core rules). But at the same time I am left with the feeling that they present a lot of tactical challenges in a deceptively simple package.

I have often described rules by this designer as being quite 'old-school'. In this case I don't think that is true at all. I think these are a modern set of rules which will let players fight 'old-school' type battles they way they remember them being rather than the way they actually were (i.e bogged down in loads of die rolls and endless charts and tables!).

I would highly recommend these rules to anyone who is either drawn to the accompanying miniatures range or interested in a more tactically challenging sci-fi game which is still simple to play.


Sunday 31 May 2015

A look at: Typhon


Typhon is Alternative Armies' game of skirmishes and heroism during the time of Greek Myth. Players lead a band of Heroes, Shades of Hades or Mythical Monsters in legendary battles, calling on their patron gods to aid them and hopefully surviving enough encounters to grow into a hero worthy of being remembered for generations to come!


Overview
Mechanically, the rules are similar to the Darkestorme fantasy skirmish rules (which I have looked at here), but are modified to both suit the period and improve on the aforementioned publication.


The book itself is an A4, spiral bound tome of 78 pages with clear plastic covers front and back. It's actually quite nice to have a book that lies flat on the table with no need to bend it back or break its spine!

Opening the book, the reader is greeted by a map of Ancient Greece, a brief overview of the game and a generous background of 12 pages outlining the myths and legends of Greece. Useful if you are new to the period or want a quick overview.

Following the introduction are the rules of play, how to create your hero and his followers, advice on scenario creation, an extensive list of powers and gifts, stats for warriors and the monsters they may face, a set of three scenarios and finally record sheets for your heroic band.

Rules of Combat
The core rules are relatively simple in their execution. Characters have two or three actions per turn, which can be used to move, fight, use a god power or carry out other tasks suitable to the scenario. To attack a foe requires a 2d6 roll meeting or exceeding the attacker's 'To Wound' score (usually between 6 and 9). If hit, the defender can make a Resist Wound roll in a similar way.

Where these rules differ to Darkestorme (and are much better, in my opinion) are the way shields, armour and wounds are handled.

If a character carries a Hoplite Shield, he may use it to block the attack. This requires a 2d6 roll and can result in the attack being negated or reduced in strength, or the shield becoming damaged or broken. Other shields merely provide a modifier to Resist Wound rolls and this provides a neat way to differentiate Greek Heroes and their ability to shield against attacks. This is also a more interesting roll to make than your typical d6 roll against a target number.

Armour works in a similar way, with a 2d6 roll on a table. My favourite entry is the roll of a 12 breaking the attacker's weapon! Other results allow various degrees of stopping power or damage to the armour. Both this and the results of using a Hoplite Shield can give a range of modifiers to the defender's Resist Wound roll.
In my opinion this is more interesting to play out than the rules in Darkestorme, but of course it is a little more time consuming. This level of detail is a welcome addition to rules more geared towards skirmishes with only a few figures on each side though. And from a game play perspective it is enjoyable to have the excitement of these rules (usually accompanied by cheers or groans depending on the outcome!).

If an attack scores a wound a roll is required to find out the effect. Monsters just have a flat number of wounds and are defeated if reduced to zero. Characters in Typhon , however, have no such thing! Instead they might be killed outright, mortally wounded and need the assistance of their fellows, avoid the wound entirely, or receive a flesh wound which gives a penalty to future rolls on the table. The table is weighted towards the character being out of the game, but as two of these options allow for the character to return to future games if his side wins, it greatly adds to the tension of the remaining battle!

Additional rules for combat provide for the use of missile weapons, using two weapons at once, having a terrain advantage and making sweeping attacks which can target more than one foe.

Your Hero also has access to Fate points, which can be used to modify initiative rolls or force re-rolls by your opponent.


God Powers
God powers are a major part of the game, so I thought they deserved their own section in this review! When you create a hero, you choose a patron god which allows the hero to have access to that god's powers in addition to a  generic set of gifts that heroes can choose from. Six gods have powers listed in the rule book (two more are available as free PDFs from the publisher). Each god has seven powers of varying potency, reflected in the amount of fate points required to 'buy' them. The generic list of gifts contains an additional 29 powers, for a total of 71! It is quite a list and very thematic compared to your usual list of skills and abilities, serving to reflect how important the gods and their patronage was to the Greek heroes.

All of these gifts are classified as either Items, Powers or Creatures. Generally speaking, Items have an ongoing effect for the whole game, Powers can be used once per game for their effect and Creatures represent some kind of summoning ability which results in the summoned entity coming into play for a certain number of turns or for the whole scenario depending on how powerful they are.
All of the powers really enhance the theme of the game and it add a great variety to the Heroes in the game as well as an interesting decisions in campaigns about whether to gather several minor powers or save up for some of the more powerful ones.


Hero Creation and Campaigns
Before playing, you need to create your band of Heroes, or if you are so inclined, your drove of Shades from Hades. This is a pretty straight forward process. You start with 50 fate points and with these you need to select your Hero and his god powers. A minimum of 40% of your fate points also have to be spent on Champions and Fighters to follow your hero. Costs for all characters vary depending on if you choose Youth, Man, or Aged characters, each of which have a different stat line and differing advantages and disadvantages along with it. Shades are worked out similarly, but have a choice of being Lesser or Greater rather than the three ages.

Once you have chosen your band, you receive a random number of coin with which to purchase weapons and armour, as well as other useful items for campaign games.

The campaign rules as presented in the book are quite a simple affair. Your Hero and Champions gain Fate Points by defeating enemies, winning scenarios and so forth. These can be kept to spend during the game, or used to buy new god powers. You can buy new warriors to join your band or, if they have proven themselves, advance a Champion to the class of Hero.


Monsters
A selection of monsters, most well known from Greek Myths and some less well known, have rules provided in the book. You can also get free PDFs of additional ones from the publisher. These are fearsome foes indeed and suitably challenging for experienced bands of warriors. As well as the kind of stats you might expect from such monsters, they also come with unique abilities that really capture their individual 'flavour'. In a very nice touch, defeating certain monsters allows a Hero to benefit in some way, for example using the teeth of the Cadmus Dragon to raise undead warriors, or the head of a Gorgon to turn enemies to stone.
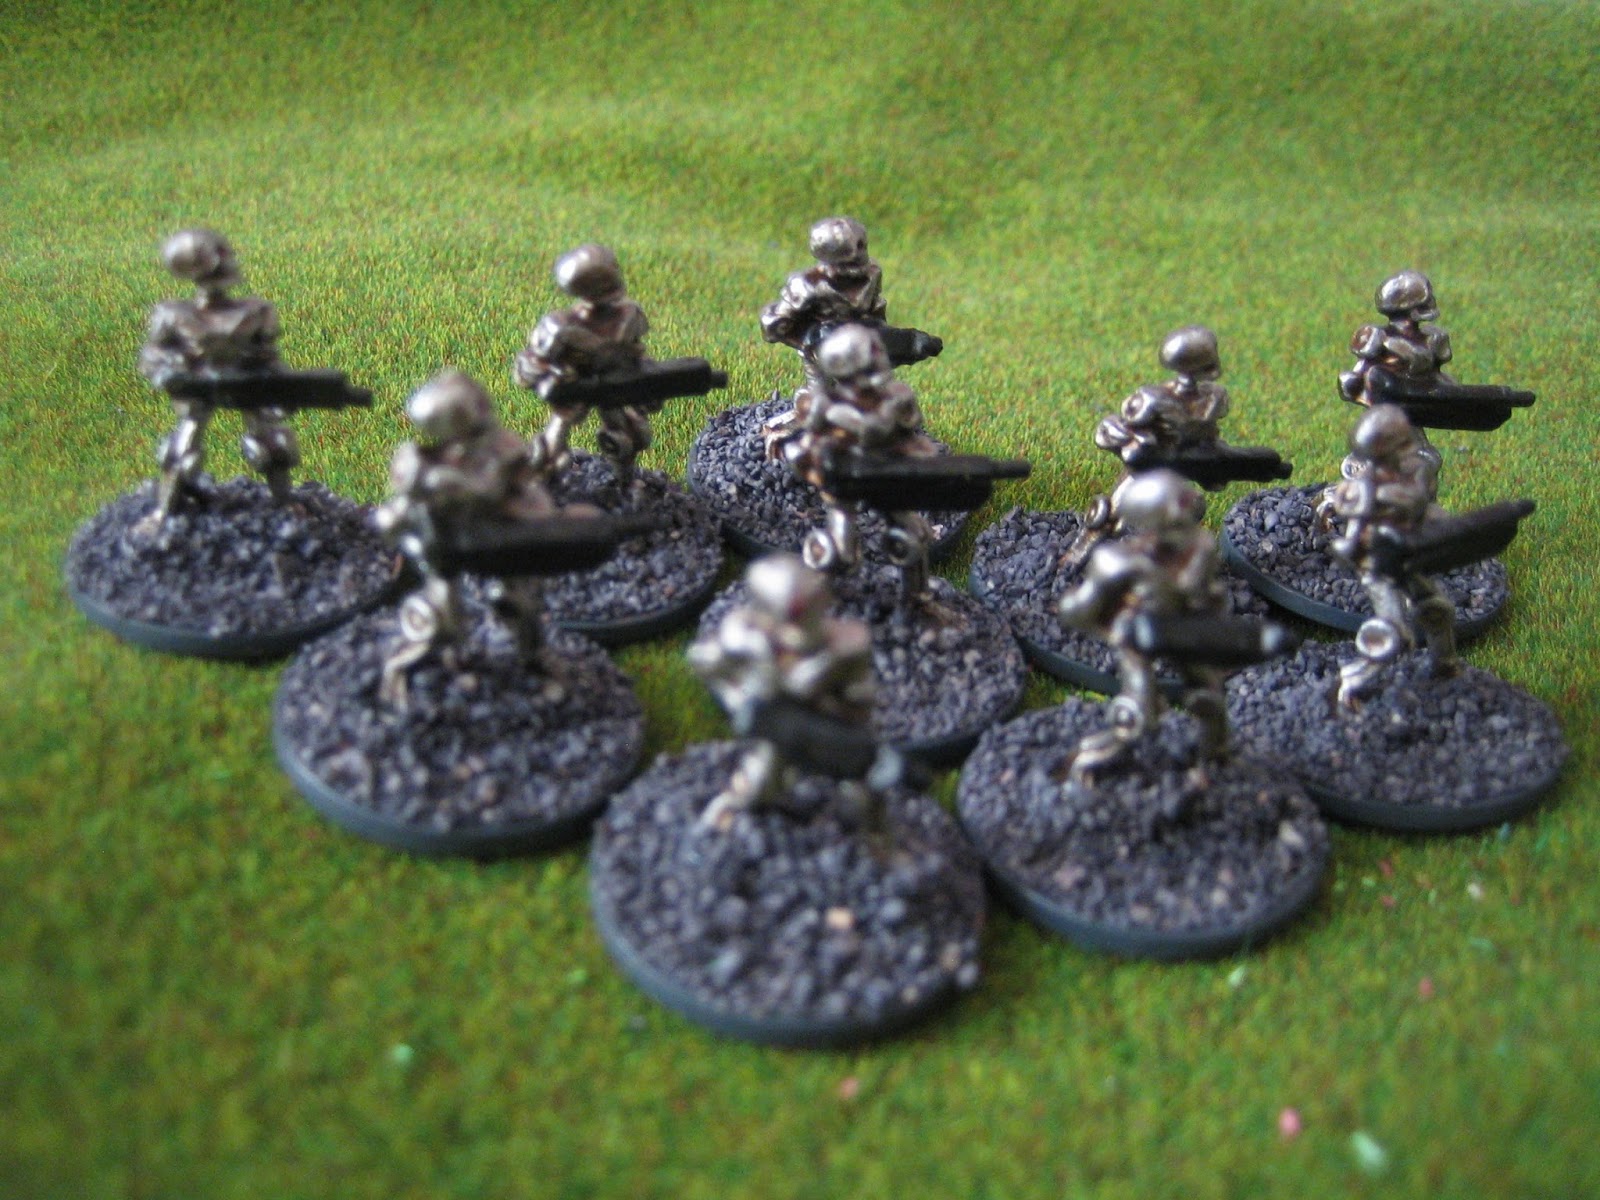
Miniatures
This is a review of the rules, not of figures, but it is worth pointing out that Alternative Armies stock a range of 'Heroic Scale' figures to accompany these rules, nominally 50mm but I think some 42mm ranges would be compatible (although I have yet to verify this). Of course, you can use whatever range of figures you want with the rules, but I find these have a certain charm about them that I find very appealing. The picture below shows two Typhon figures next to the silhouette of a 28mm Flintloque miniature.


Conclusion
These rules take mechanics from a generic fantasy skirmish game and, with the odd tweak and adjustment, turn them into something that feels quite different. In fact I'd have to say I prefer them to the set they were based on. At their core, the mechanics are pretty simple, but there is so much flavour layered on top that it doesn't feel this is detrimental when playing. I can't say I have played other rule sets for the 'period', otherwise I could offer some kind of comparison. But what I can say is that I don't feel the need to rush out and buy any others! I would like to see the rules supported by a more comprehensive figure range (there are some god powers that summon monsters not currently available) and perhaps the main drawback is a lack of fully fledged campaign rules, but these are not insurmountable problems.

I thoroughly enjoy Typhon and would recommend it to people looking to recreate Mythic skirmishes with a small number of figures. The rules are easy to pick up and play or teach but with a good deal of variety and fun to be had.

(All pictures are taken from the Typhon overview PDF, free from Alternative Armies).